
Setting up own router (specifically Google Nest Wifi Pro) instead of one provided by Vodafone took quite a while to connect all the dots so I decided to share a knowledge.
Theory #
First, the theory. If, for instance, you want to setup Wifi mesh network, or you want a combined smart and wifi hub, you'll need to use own router instead the one which provider gave. In this case they suggest such setup:
Fiber network <-> ONT device (modem) <-> Provider's WiFi router <-> Your router
This configuration is easy and quick to set up by connecting a LAN port from the provider's router to your router's WAN port. However, this setup has several issues:
Double NAT: Requests pass through an extra network hop because both routers perform Network Address Translation (NAT). This can create issues with remote access, such as accessing your PS5 via PlayStation Portal or cause problems with online gaming.
Energy Efficiency: Provider-supplied routers are often relatively power-hungry, even though all you really need is basic VLAN tagging and network switching, which can be done by your router or a managed network switch.
Privacy: Using your own hardware gives you greater visibility and control over your network compared to using devices provided by your internet provider.
Ideally, you would directly connect your ONT to your router, but some routers, including Google Nest WiFi Pro, don't support VLAN tagging, which Vodafone requires. Vodafone uses VLAN tagging (ID 911) to distinguish internet traffic from other services like Voice-over-IP and from other providers. A managed network switch can handle VLAN tagging, giving you the following optimized setup:
Fiber network <-> ONT device (modem) <-> Managed network switch <-> Your router
Here, the router handles routing, DNS, and IP addressing, while the managed switch manages VLAN tagging.
Digramm describing network connections: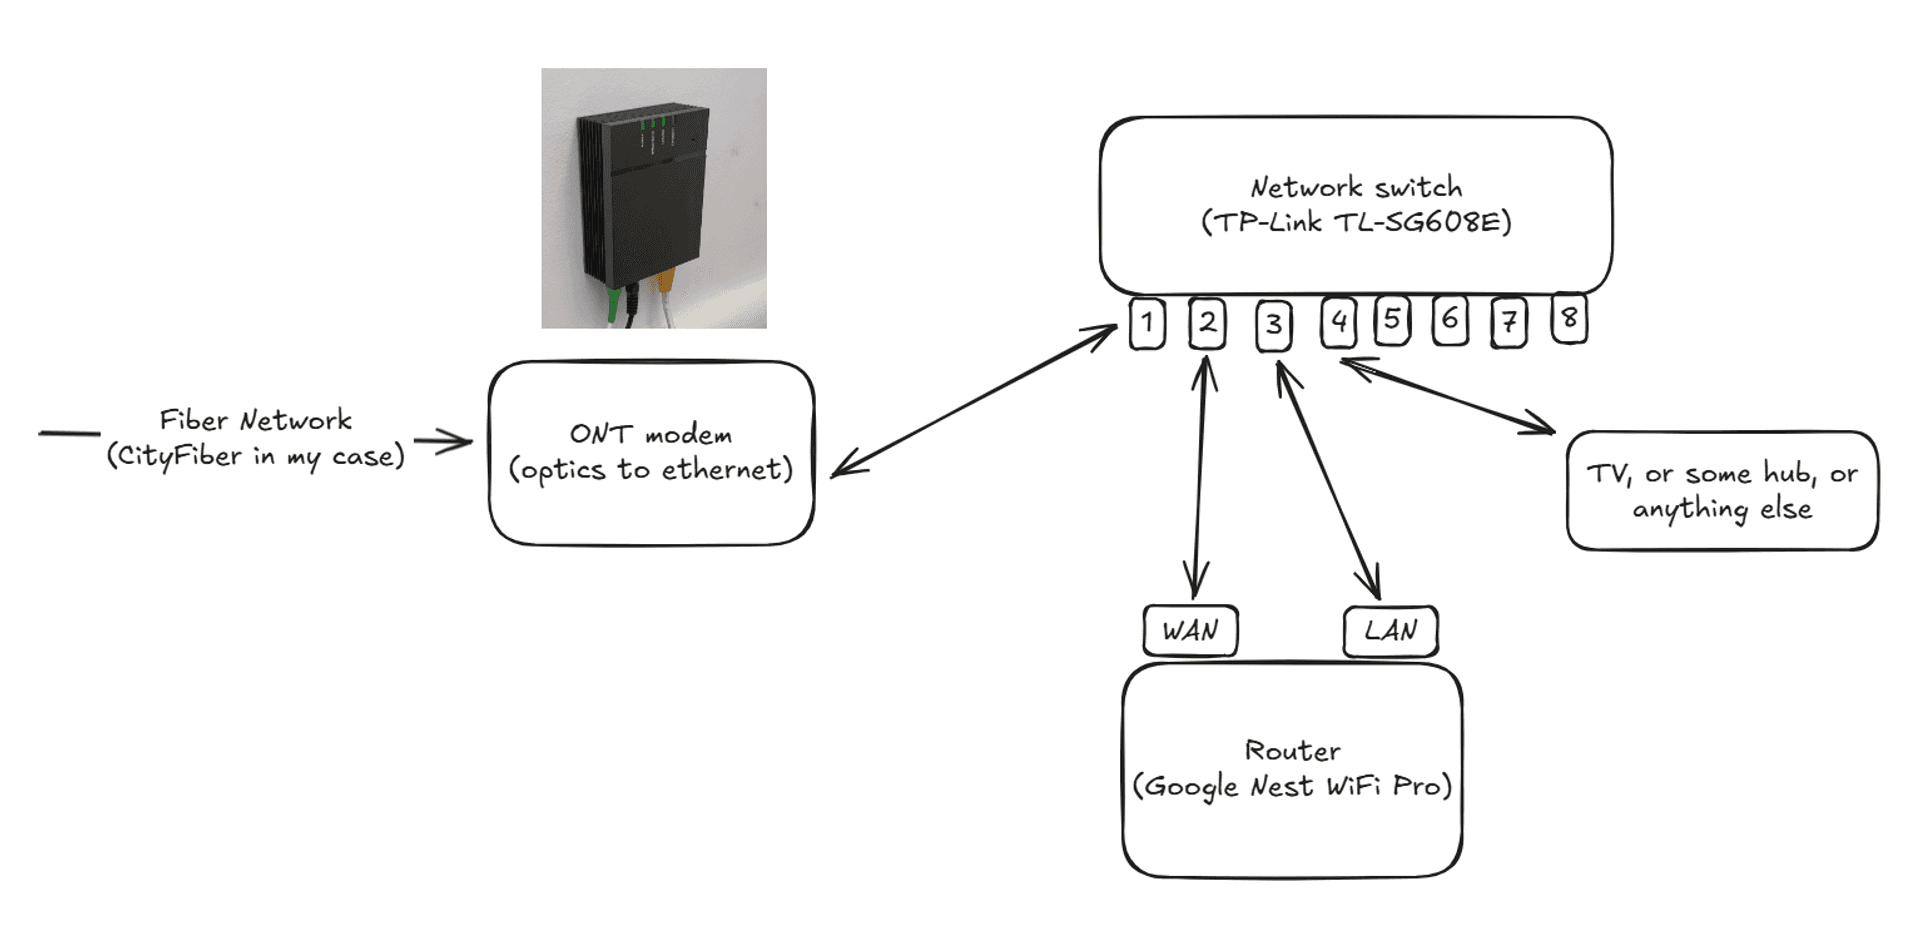
Practice #
So, how to make it work?
- Contact your internet provider to get PPPoE credentials. It's a set of login and password which authenticate your connection to internet provider.
- Buy a managed switch which has VLAN tagging support. I picked TP-Link TL-SG608E switch since I have good experience with other TP-Link product throughout the years.
- Setup managed switch: make it to accept and send VLAN tagged network packets through port 1, and untagged on port 2. For this:
- Downloaded TP-Link "East Smart Configuration Utility" which works with TP-Link TL-SG608E or open web UI of switch (my switch had adress http://192.168.86.36/)
- Connect TP-Link TL-SG608E to your router via ethernet cable or directly to your PC
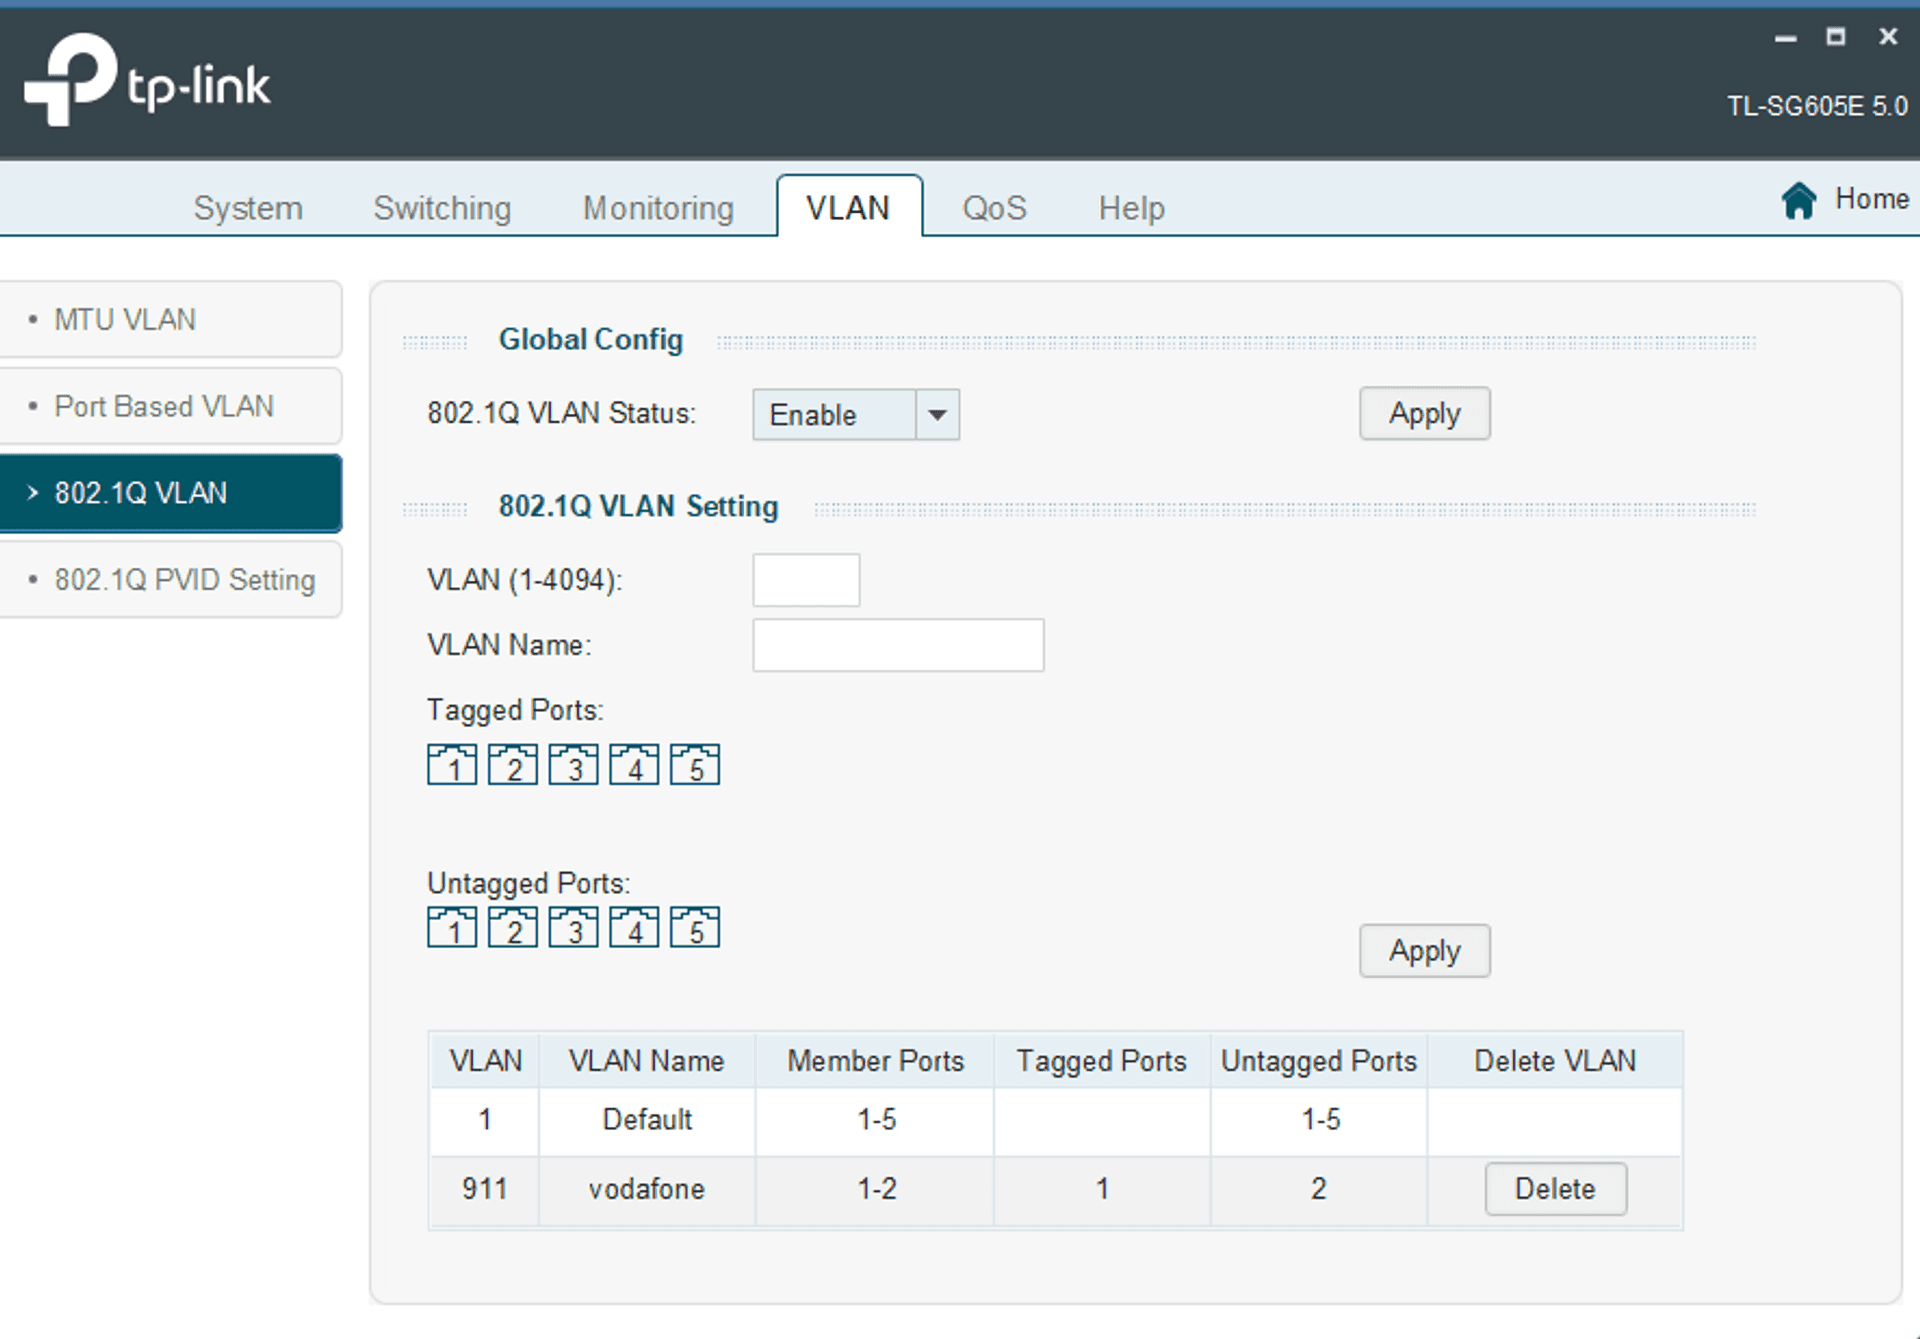
- Update switch config (see screenshots). VLAN ID 911 -- is Vodafone specific web traffic VLAN ID. If you use other provider, you can ask support for correct VLAN ID. Config:
- On VLAN - "802.1Q VLAN" tab: Port 1 VLAN ID 911 tagged and Port 2 VLAN 911 untagged (you need to click on port's image),
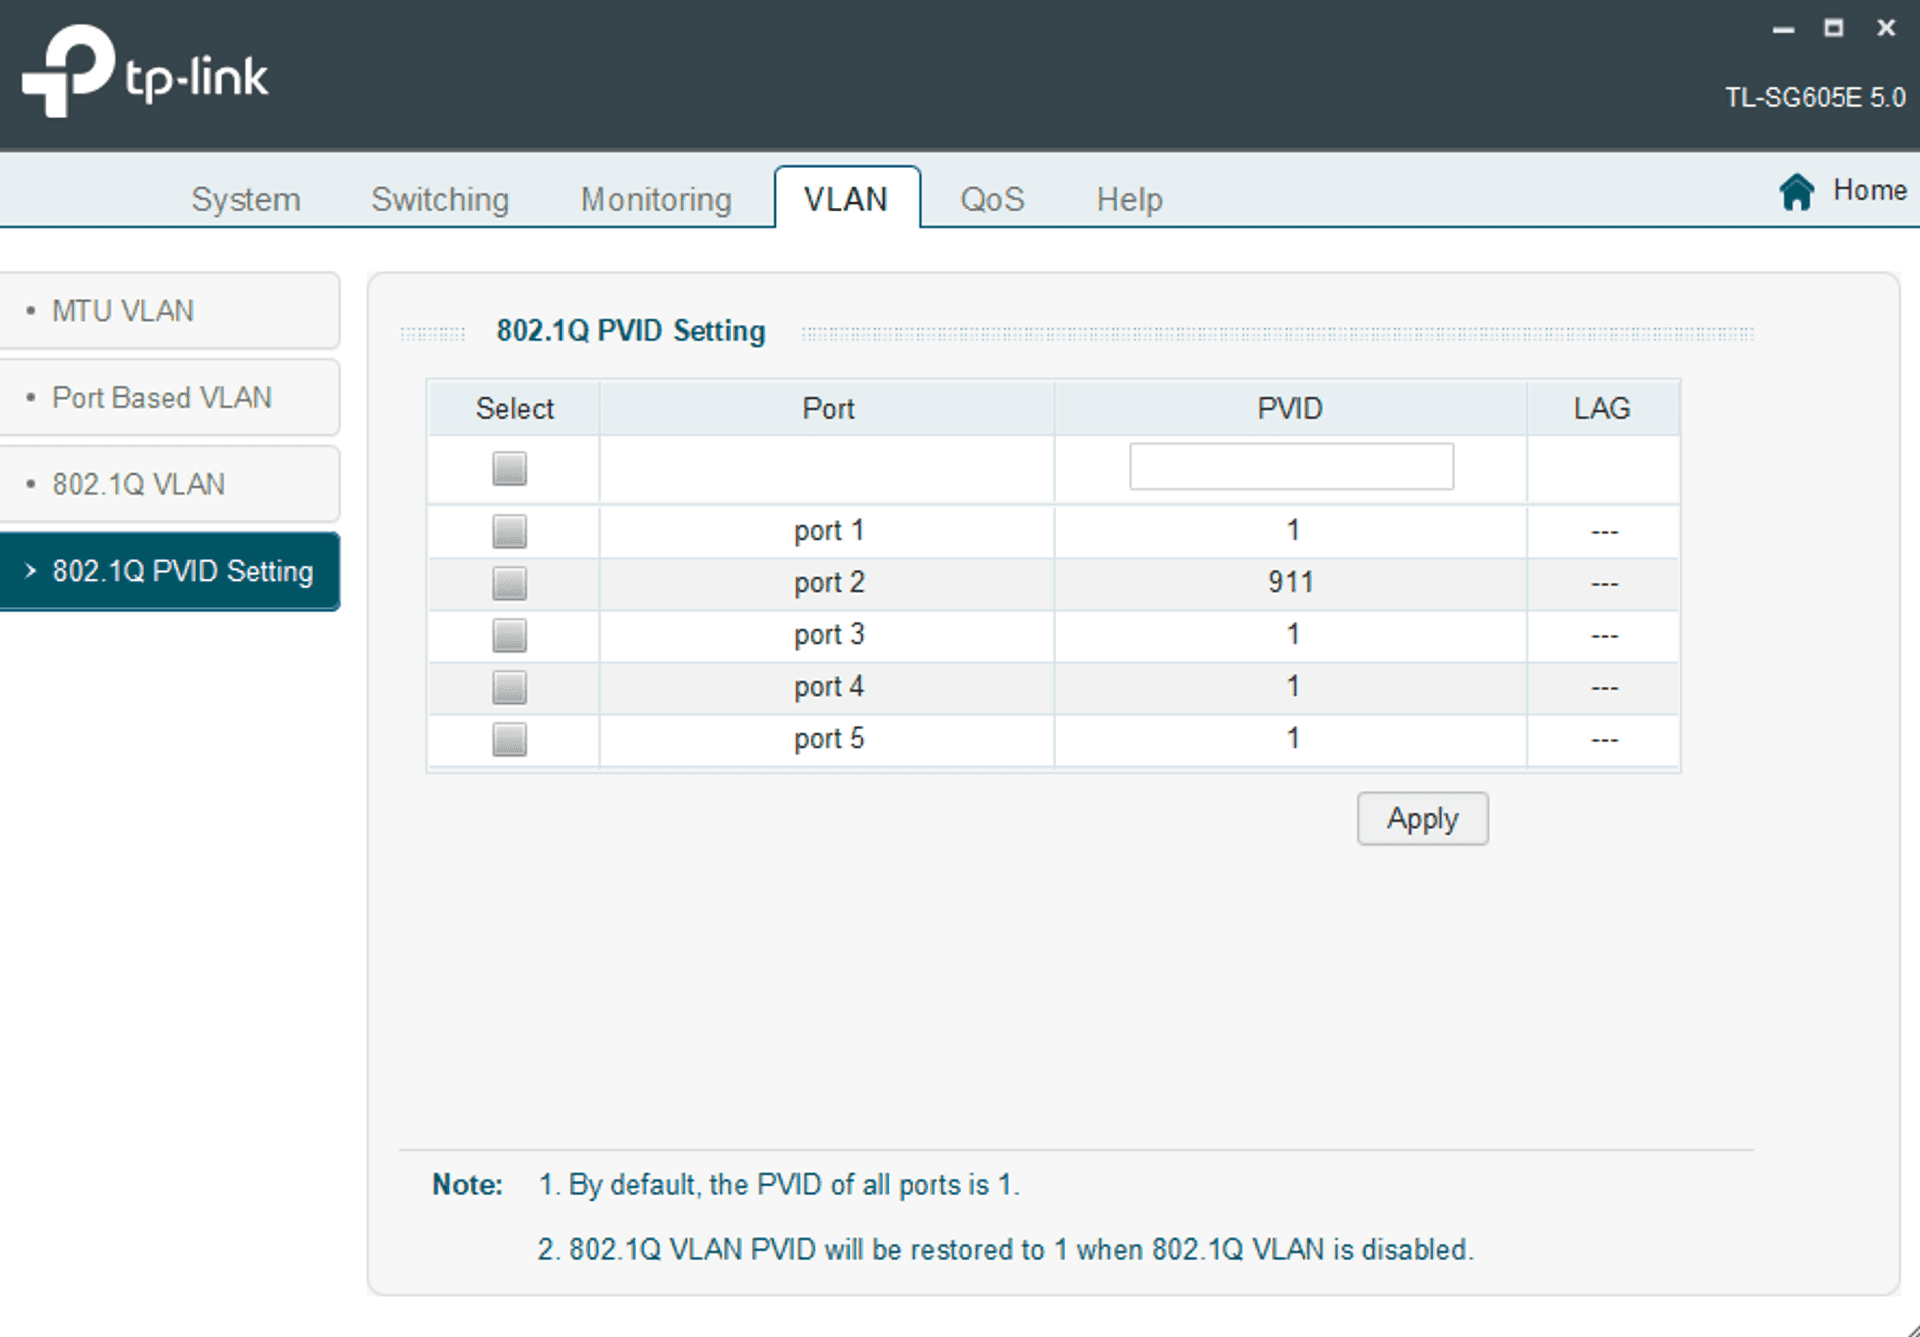
- On VLAN - "802.1Q PVID" tab: Port 2 PVID 911.
- Setup Google WiFi Pro to directly connect to provider. That was time consuming since updating existing setup from DHCP to PPPoE is quite unstable.
- Open Google Home mobile app
- Go to Wi-Fi - Network Settings - Advanced Networking - WAN connection
- NB! Disconnect your phone from mobile network
- That's the tricky part. Until router has internet access, you can't update these settings. So you need to plug off ethernet cable from router and wait until warning "You cann edit these settings at the moment" will go away. It took me several iterations and around 20 minutes connecting-diconnecting ethernet cable, returning back and forth from this menu section in app until it finally allowed to change settings. And even after this it didn't save settings with error "Oops, ...". So I did a few more cycles to try to save it.
- Enter PPPoE credentials provider gave you in step 1.
- Hit OK and Save icon in right top corner (at least in iOS app).
- Connect all together:
- ONT connects to Port 1 switch
- Your router's WAN port (Nest WiFi Pro in my case) to Switcher's Port 2
- If you want to utilise other switch's ports for local network device, you need to connect router's LAN port to Switcher's Port 3 as well.
And it should just work.
Good luck with optimizing your local network!
***
Since you've made it this far, sharing this article on your favorite social media network would be highly appreciated 💖! For feedback, please ping me on Threads.
Published